To start hydro gardening you need a few supplies. I have provided links to sites in order to facilitate anyone who cannot find a local store that stocks these supplies. Gardening stores are becoming more and more available.
Deep water Culture:
1) Container: Big plastic tub. For a deep-water culture, I like the Sterlite 10 gal. and 18 gal depending on plant to be grown. I also prefer the gray color. It keeps out the light and helps keep algae growth to a minimum.
2) A few 3-5 inch net pots depending on what you want to grow.
4) Aquarium air pump. Get a inexpensive aquarium pump from Wal-Mart. Some of these pumps come with multiple airline outlets. Keep in mind that each tub will require its own air outlet on the pump. If you try to string multiple air stones, off of one airline outlet, and place them in multiple tubs, only the tub with the lowest water level will receive proper aeration
5) Aquarium air stone, the longer the better, just make sure it will fit in your tub.
6) Aquarium air tubing. Connects the air stone to the air pump.
OK, now we are ready to set up the apparatus. First, you need to find the size of net pots you want to use. I use 4-inch pots for things like herbs, lettuce, things that do not require a lot of support. I use 6-inch net pots when I am growing things such as tomatoes, peppers, or zucchini. I use 10-gallon Sterlite containers for my lettuce some vine things like cucumbers but I use the 18-gallon container for things like tomatoes. This is purely preference in that I have grown all of these vegetables in different size tubs and net pots, this is just my preference.
Once a tub and pots have been selected, you need to cut holes in the top of the tub. Look at the net pot; see how there is a lip at the top? That is what is going to keep the pot on the top of the tub. So… Big, big Idea here! Smaller holes are always better. It is better for the pot to ride a little high in the hole than to fall through. So use a pattern to get a proper hole drawn out on the top of the tub. I would suggest a layout as follows for both thee 10 and 18-gallon tubs.
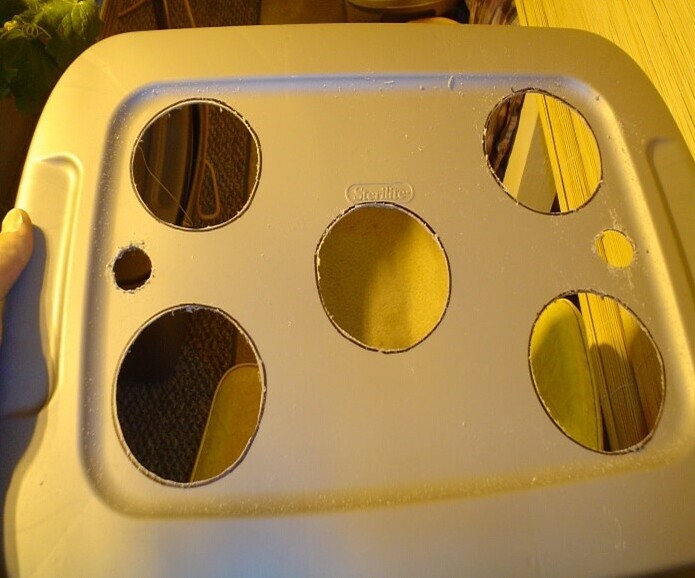
There are several ways that I have cut these holes but I find two are better and one is my preferred way. A Dremel tool can be very useful. I use a drywall bit in order to cut in a rough hole. Be careful here in that you need to have a very firm grip on the tool and you need to wear eye protection. After cutting the rough hole, I use a sanding drum to finish the job. Be very cautious as hot plastic can fly off the tub and burn you. This is a job best to be done outside. My preferred means of extracting the holes is to use a circle cutter. This cutter has a central pivot point. You set the diameter of the hole and cut it out. This is the easiest and safest way in my opinion. Once you have cut the holes, the pots should fit in nicely.
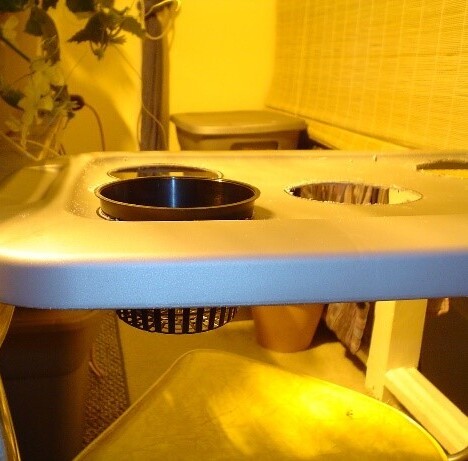
So now that the holes are cut we need to drill a single hole about 3/8th in diameter on the top as described in the figure. This is for the airline. Place the air stone in the tub, connect an airline, and connect the other end to the air pump. We are ready to go.
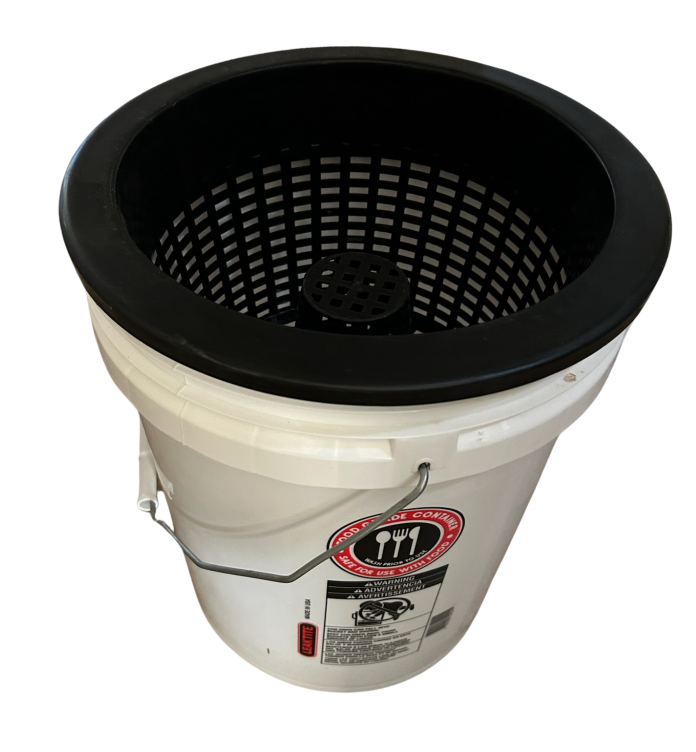
If you are planning only on one or two plants, a very simple 5-gallon bucket setup might be perfect. There are net pots that fit directly on top of a 5-Gallon bucket. Add an air pump and an air stone and you are ready to plant.
 Place the air stones at the bottom of the reservoir using suction cups for stability. Hook it up to the air pump, thread the air tubing through a gap in the reservoir or lid, and you’re all set for that steady stream of little bubbles that your plants will love.
Mixing nutrients is key. You want a balanced hydroponic nutrient solution suitable for the plants you’re growing. Follow the manufacturer’s instructions carefully to keep your plants fed. Remember to replace or refresh the water-nutrient mix every couple of weeks to keep things fresh and prevent unwanted buildup.
Keeping your system running smoothly means regular check-ups. Monitor pH levels and nutrient concentrations using a handy testing kit. Adjust the pH if it’s off—you’re aiming for a range between 5.5 and 6.5 for most plants. Also, check for root health; healthy roots should be white or light tan, not brown or slimy.
Even in the best systems, issues pop up. Yellowing leaves might indicate nutrient deficiencies, too much water, or even not enough light. Root rot is another common issue that can be tackled by ensuring your water is well-oxygenated and changing it out regularly.
For maintenance, cleanliness is next to godliness. Every few weeks, take time to clean the air stones and tubing so you don’t end up with algae or bacterial growth. Also, ensure your water reservoir itself is scrubbed clean as needed. Keeping everything tidy is crucial for healthy plants.
This is such a helpful guide! I’m curious—have you tried using different nutrient solutions for specific plants? Which ones do you find work best for things like tomatoes versus herbs? Also, how often do you typically need to adjust the pH levels? I’ve heard it’s important but not sure how often I’d need to test and tweak. And any tips on preventing root rot beyond just keeping the water oxygenated? Would love to hear more about your experience with those challenges!
This is a great step-by-step guide for setting up a DIY deep water culture system! The breakdown of materials and setup process makes it feel approachable, even for beginners. How often do you find it necessary to adjust the pH levels, and do you have a preferred nutrient mix for maximizing plant growth?